Designing a Backpack for Redbubble
- Kaaren Poole
- Jun 16, 2025
- 5 min read
How I started on Redbubble
A few months ago, I discovered Redbubble (a company producing print-on-demand products) thanks to a video class by Suzanne Allard. Her class combined creating a floral design on paper with using that design to create products on Redbubble. I was intrigued—not so much with painting the floral, but definitely with what Redbubble could do with a painting!
I had everything I needed to get started, namely lots of artwork, a scanner, a copier, and Photoshop Elements. So, I dove right in. Now, two months later, I have seventeen designs in my shop (which you can find here).
Redbubble Products
Redbubble has a wide range of products upon which they CAN print your artwork. Each time I add an image, Redbubble shows how it will look on their various printable products. For some, the image may not work. Perhaps its size or proportions won’t fit on the product. And the more advanced products—socks, a backpack, and a duffle bag—require special attention.
I’m mostly interested in products for gifts, such as zipper pouches, clocks, blank journals, throw pillows, and so on. But, for just one of my designs, the backpack sort of works.
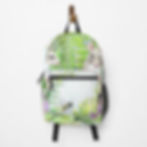
The Backpack Challenge
Whatever your image, Redbubble superimposes it over the pattern for constructing the backpack. You can increase or decrease the size of your image or move it right, left, up, or down. But the orientation of the pattern pieces remains the same.
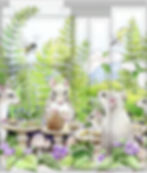
For example, whatever you have in the upper left portion of your image will end up on the front zipper pocket of the backpack.
My “Mice Having a Tea Party” piece is a different proportion than the backpack pattern. My image is landscape orientation while the backpack pattern is portrait orientation and is close to a square. Redbubble took this into account when it created its design of the mice backpack by selecting just a portion of my image. Considering I hadn’t designed with this product in mind, the backpack didn’t look too bad. It does, however, leave out one of the main parts of the art piece—which is the second mouse from the right looking up at the bee. So what about designing an image that would work on a Redbubble backpack?
Purposely Designing a Backpack on Redbubble
Getting the Pattern
Once I figured out how Redbubble places images on products, I was determined to design an image specifically for a backpack. It would turn out to be something of a challenge, especially getting the pattern (which Redbubble is happy to share with its artists) in a form I could use.
This seems like it should be easy enough. Simply download the pattern and get to work! It may actually be that simple for someone with a full array of computerized design tools. But that’s not me. However, after about an hour of pondering and experimenting, I thought I had an approach that might work for me.
In the end, I didn’t use the pattern that Redbubble made available. Instead, I began by downloading the image of the pattern imposed on my “Mice Having a Tea Party” design (the second image in this blog post).
Determining the Size and Proportions for my Image
My first step in creating my pattern was to determine the proportions Redbubble required. This was easy, as Redbubble tells me in the description for editing a backpack product that the size, and hence the proportion, is 3900 x 4575 pixels.
But that’s the pixel size. What about the size of the paper I would create my image on? And, I needed more than just the overall size. I needed the sizes and placement of all the pattern pieces. Yikes!
When I’m done creating my original image, I’ll need to scan it. My scanner has a 9” x 12” bed, but I’ve learned that the maximum actual scan size is more like 8 ½” x 11”. I decided I’d like my image to be 8 ½” wide. But how tall should it be? Well, it needs to be the same proportion as the Redbubble pattern. In other words, the ratio of my image width to my image height needs to equal the ratio of the Redbubble pattern height (4575) to the Redbubble pattern width (3900). Doing the math, my result is 9.97" but I'll ca;; ot 10".
OK. My paper (or, the part of my 9” x 12” piece of paper that I’ll work in) is 8 ½” x 10”.
Placing the Pattern Pieces on my Pattern
So far, so good. But now I have to place the pattern pieces correctly within my 8 ½” x 10” paper. I’d need to create a template that’s 8 1/2 ” x 10”.
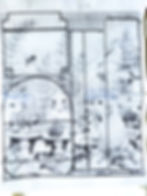
I began my measuring the pattern for the Mice backpack that I’d downloaded from Redbubble and then determined how much I would need to increase or decrease it to be 8 ½” x 10”. It turned out that I’d need to create a copy that’s 107% of the original.
I had to copy it in two halves then tape them together. Here’s what I ended up with. I darkened the outlines of the pattern pieces then traced them onto the paper I’d create my original on. For the tracing, I just used light pencil, as I’d be erasing these lines when finished.
Designing a Backpack for Redbubble – The Fun Part
At last! With the math, printing, and copying all done (hopefully, correctly) I could finally start designing and creating my original art piece. It was a new kind of designing for me, as I’m used to working on a straightforward image rather than creating individual pieces destined to be sewn into a backpack!
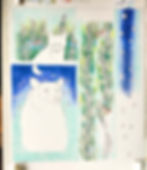
I wanted bears and decided to have two—one on the front zipper pocket and the other on the upper arched section. One would be by day and the other by night. Then I’d need some long, thin pieces, presumably for straps and the pieces between the front and back of the backpack. Comparing the mock-up of my Mice backpack with the image of how the pieces would be cut from my original art gave me some hints about what these three strips are for, but I won’t really know until I finish the design, order the resulting backpack, and see the real product.
Here's my drawing:
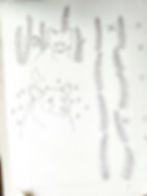
And here’s the piece after I did some work on it. I can’t wait to see how it turns out!
Why I Started This Project
I asked myself this question many times as I was struggling to come up with my pattern template. I kept thinking “it can’t be this hard!” But it was. Redbubble offers a downloadable .png template. But it didn’t have any measurements written on it. That’s why I think it’s for designers to use on a computer. But I’m still—and probably always will be—in manual mode.
I know that it’s perfectly possible that the backpack won’t work out the way I think it will. And that’s just another reason to ask myself why I’m doing this.
The answers are that I like a challenge and—even more importantly—that if I’m successful, it will be worth the three or four days’ investment I’ll be making in it. And even if it isn’t successful, there are paths forward. If my errors are simple, I can correct them and try again—or not! And I can probably do something else with my two little bear paintings.
I can’t wait to see what happens next, and I’ll tell you about it whether it’s a success or a failure!
